Getting Started With Jiny
All you need to know about getting Jiny assistant up and running inside your mobile application
If you're new to Jiny and want a quick overview of what it's all about, this getting started tutorial is for you. We'll introduce the core concepts of Assistive UI and then get you on your way to configuring it and going live.
This is a fairly quick read for you and we've thrown in some videos along the way. There are also optional step-by-step tasks that you can do in your own Jiny dashboard as you follow along with these lessons.
If you haven't already signed up, you might want to do so now because this tutorial includes a number of simple tasks that you'll need to do in your own Jiny dashboard.
You can request Jiny pilot (Limited access) by clicking here.
When you're ready to get started, follow the steps below:
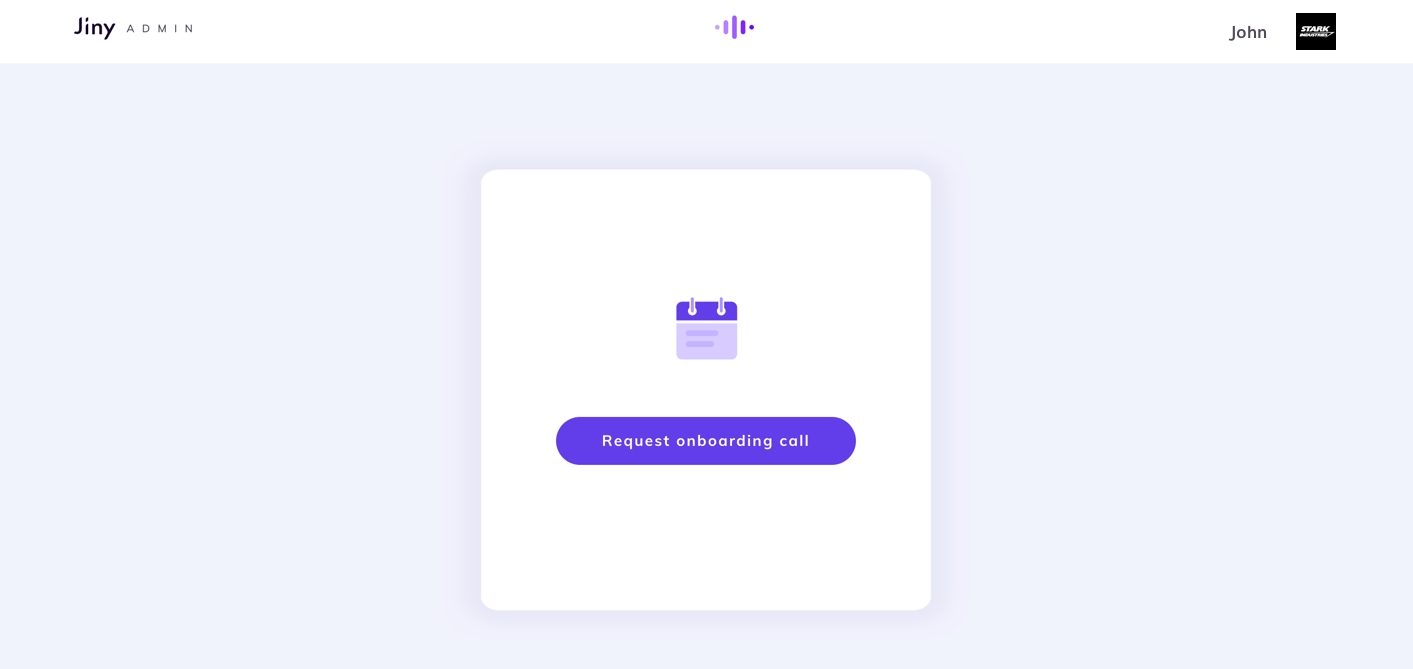
Step 1: Request an onboarding call [T-10]
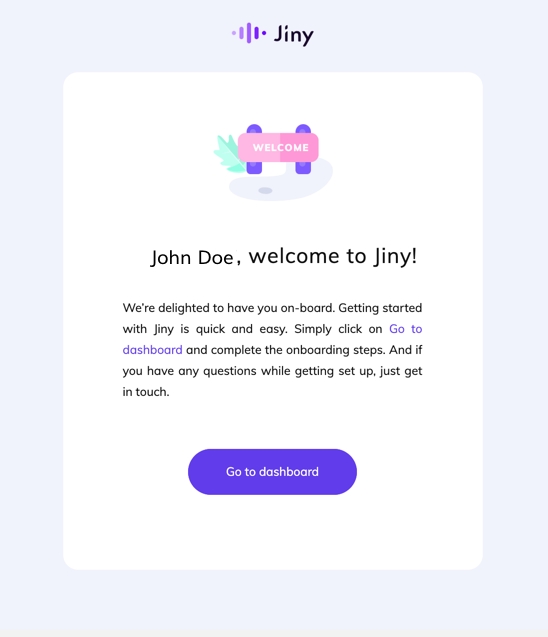
1.a Once you have confirmed your pilot, you will receive a welcome email from us with a link to signup for the dashboard. Click on 'Go to dashboard'.
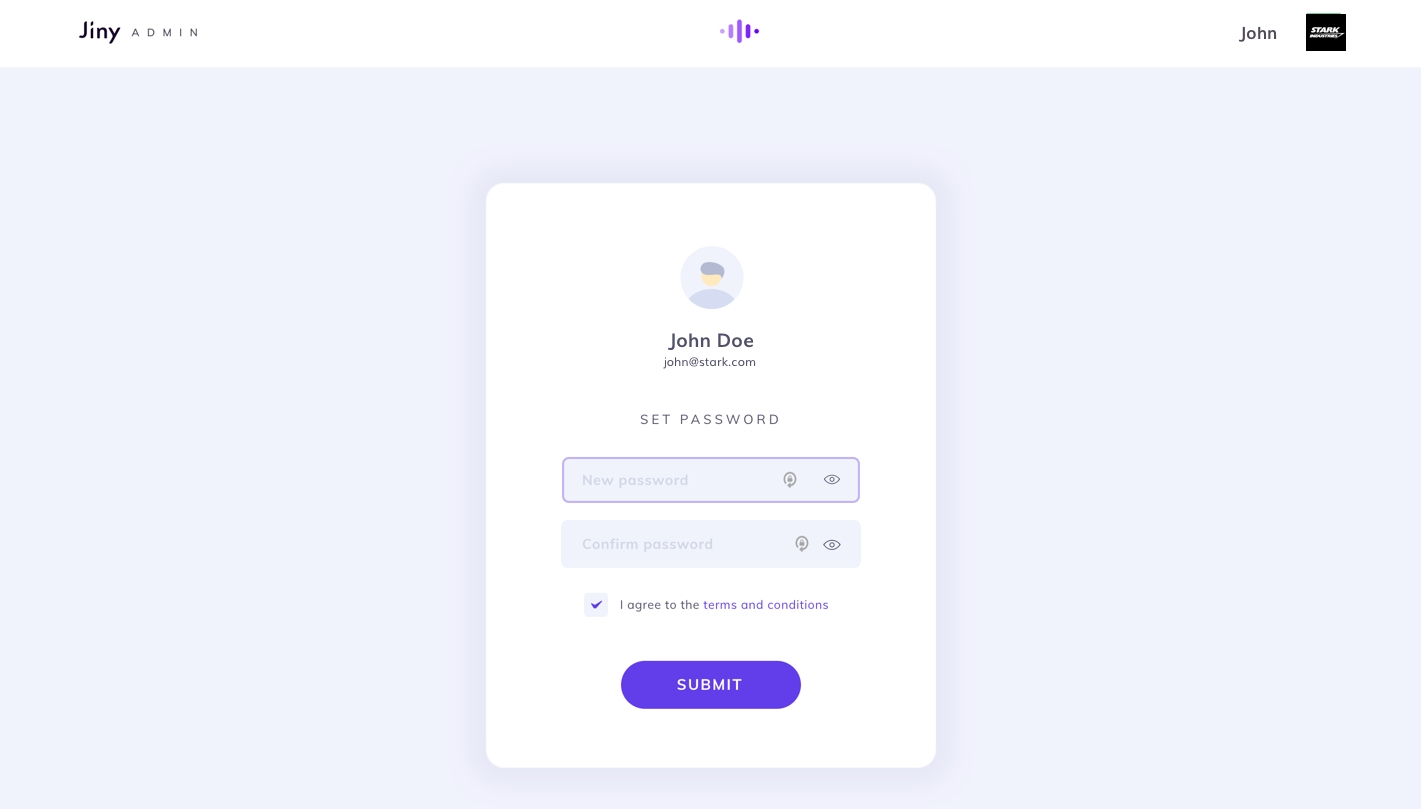
1.b You will be redirected to a signup URL. Set a secure password and agree to the terms and conditions to proceed.
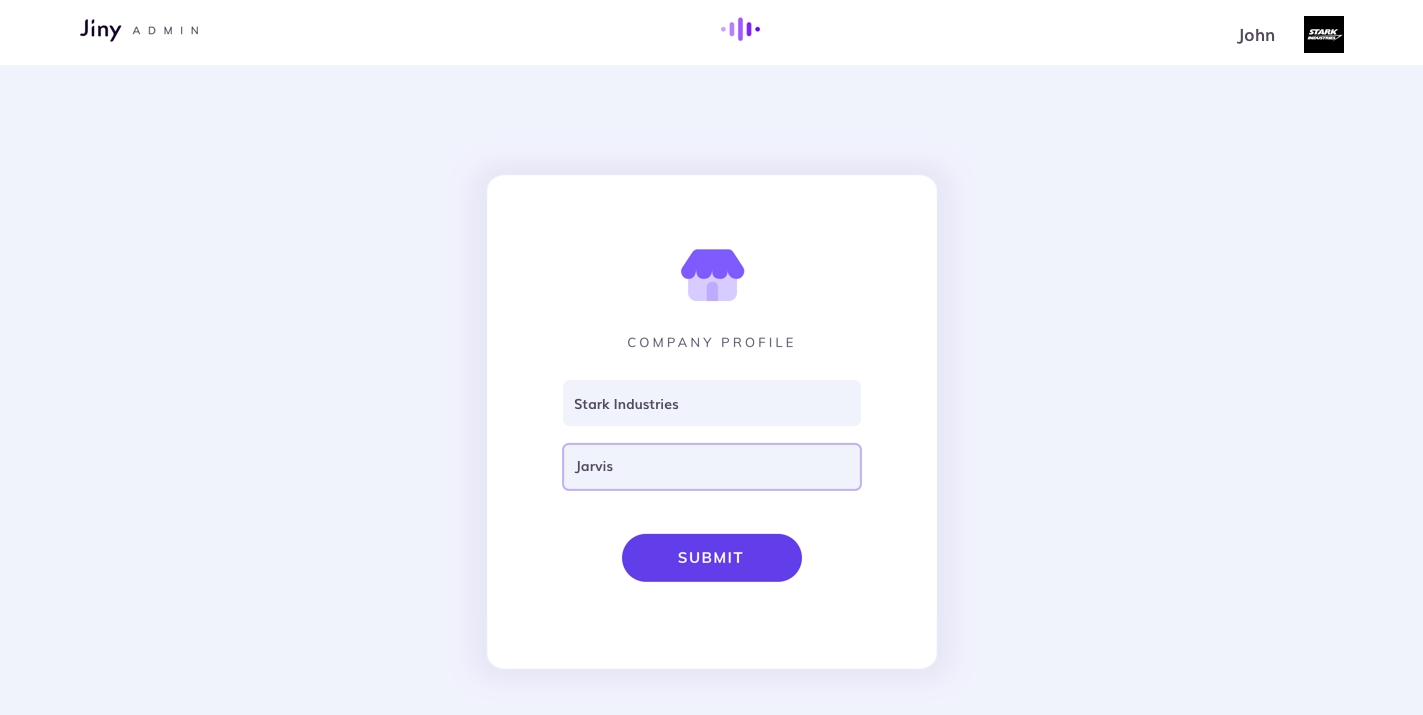
1.c You will need to add your 'App Name' to proceed to the next step
1.d On the next screen you will be able to request an onboarding call.
Step 2: Onboarding call [T-9]
This step involves both product experience and engineering to discuss the below objectives:
Defining the scope of the pilot
Understanding the pain points, baseline, and goals of the app
Jiny features and capabilities
Explanation of the flows using the app demo
Explanation of integration steps
Once this session is over, you will need to complete the Jiny SDK integration and share the APKs. We require both with and without Jiny build for debugging purposes. Only after this, Jiny's customer experience team will start working on the configuration and deliver a draft experience within the defined timeline.
Step 3: Experience review call [T-5]
Based on the scope defined during the onboarding call and the expected experience, we will push the config through our cloud editor. The experience will be reflected in the same build immediately.
Once you have tried the experience, our team will connect with you for a review call. In this call with your product experience team, we will discuss improvements or suggestions.
If there are changes, we would make the necessary changes and push the config and repeat step 3. If not, once you have given a go-ahead we would move to the next step.
Step 4: Delivery and release plan [T-3]
In this step, the final version of the experience will be delivered in the required build. We would require a release date for the newer version of your app and details about targeting. You can read more about Jiny's whitelisting mechanism here.
We will share the release plan for the go-ahead.
Step 5: Final test and review [T-2]
At Jiny, we ensure that Jiny experience of your app is seamless across devices type and android versions. 2 days before the release, we share a comprehensive testing report with you. It will help you understand the coverage of Jiny's experience within your user-base.
With this, you are good to release Jiny enabled app version. Time to make your Bharat users proud!
Step 6: Release and measure [T-0]
Now that you have released a whole new app experience to your Bharat users, measuring how they are using the app becomes important. With our analytics dashboard, you can see details about every interaction of a user with Jiny's assistant.
If you are stuck on any of the above steps, our dedicated customer experience team is ready to rescue you. Write to us at support@jiny.io or call one of us directly.
Last updated